


![]()
![]()
![]()
![]()
![]()
![]()
|
Free lesson
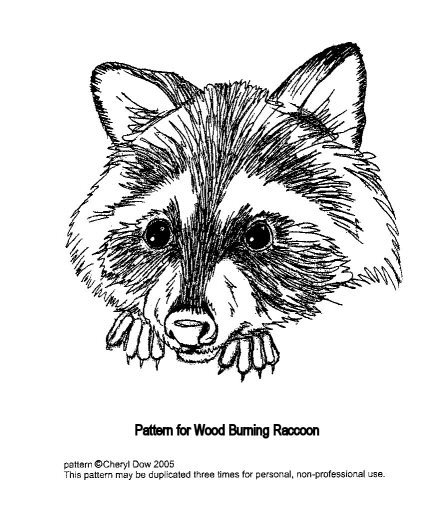
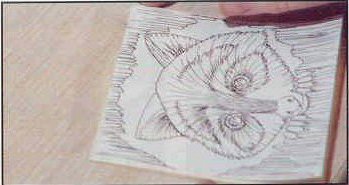
Click here to go to new page with printable pattern
1/ Before you burn on any thing, it is helpful to learn as much as you can about handling every point. The highs and lows you can burn at, the different strokes and depths at which you can burn and the lightness or heaviness of touch you need to do more than just a brown drawing. Whether it is on wood, leather, gourd, paper, tagua nut slices, canvas, or any other medium, you need to practice first. It is easier to live with mistakes on a buddy board than it is on an actual project. Even if you are working on a project, going back to the buddy board to practice different things helps a whole lot.
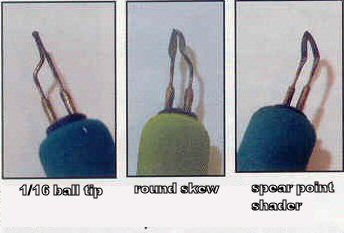
2/ The three points above are the basic ones I
use: A/ 1/16" ball point B/ Round heeled Skew
C/ Bent Spear Point Shader (these were misnamed
in the article)
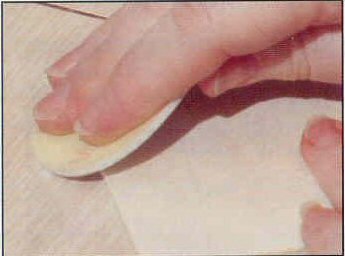
3/ Prepare your wood by finish sanding it with 400
grit and then with the 600 grit sandpaper pads
(available from us or use plain sandpaper) to make
the surface as smooth as a "babies bottom".
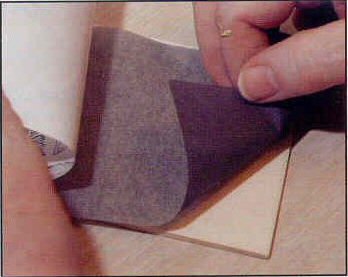
4/ With one long piece of cellophane tape, attach
you pattern to your board.
5/ Place graphite paper, dark side down under the
pattern.
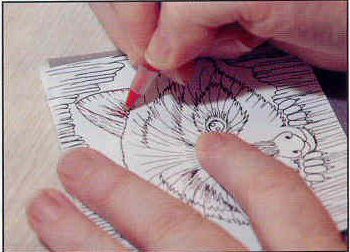
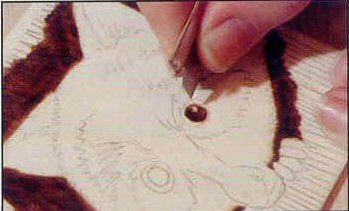
6/ Use a red fine ink pen (so you can see where
you have been) to trace your pattern carefully onto
the wood.
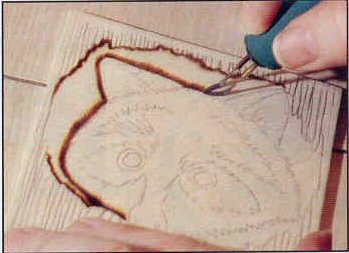
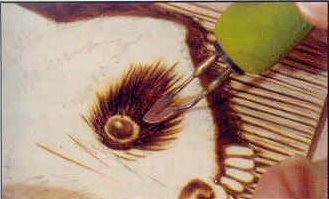
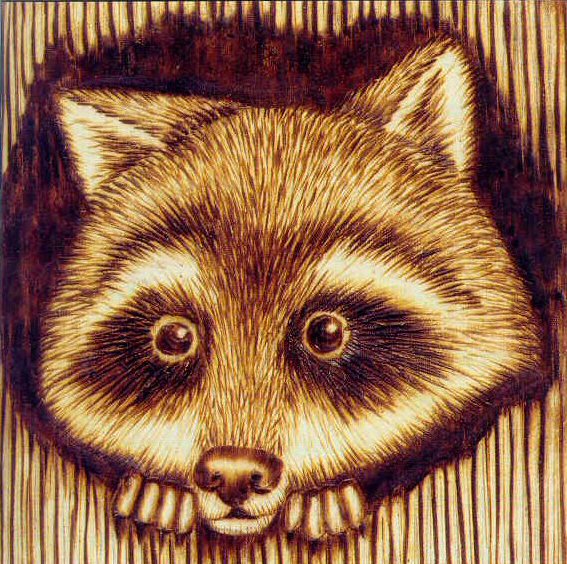
7/ Using the bottom, side of the point of the Bent
Spear Point Shader, softly out line raccoon. Do
not cut in - that is why we use the shader.
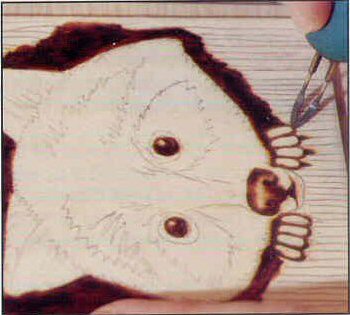
8/ Still using the Shader, color in the black
little eyes, avoiding the highlight area and then
etch out the highlight with the point of a single
edge razor blade.
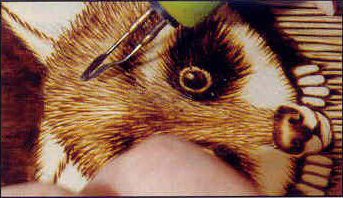
9/ Using the middle of the shader like a paint
brush, slowly bring the darkness from under the wood
and behind the raccoon to fill in the hollow area.
Also use it to put outline and shade the nose,
leaving highlights with blended edges.
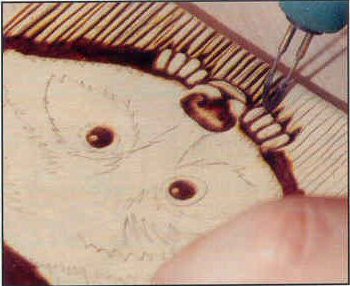
10/ Still using the shader, but more up on the side
and point, slowly put in the heavy grooves in the
wood. and around the fingers.
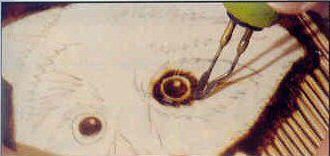
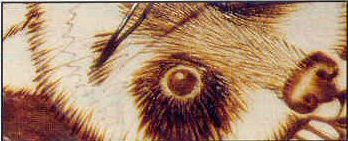
11/ With the very tip of your Round Heeled Skew,
touch in around the edge of the eyes, leaving a
light area around the edge.
12/ With long hot strokes, holding your skew at an
angle to widen the stroke, pull in the long curves
to make the mask. Remember to make them random and
to avoid stopping at the end of them. Blend the
area a bit to keep it smooth.
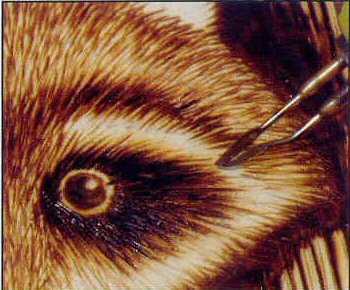
13/ Still using the Skew, with a few strokes bring
in the shadow lines around the edges for a base for
the lighter hair. Make these random also.
14/ Put in the eyebrows a bit dark, going first in
one direction, turning the board and then going in
the other.
16/ Blend from dark areas into the light ones.
17/ Finish the ears and re-etch the highlights.
This little fellow is a great way to get into Fur!
Happy Burning........God Bless........ Cheryl
|

Copyright © 2008 [Artist Cheryl Dow]. All rights reserved